Category Archives: BBQ

Grilled Lamb Chops with Grilled Asparagus

Grilled Lamb and Asparagus

We finally had some warm spring-like weather fit for grilling this weekend. 72 degrees on Sunday-very welcome after the brutal winter we endured. I had a little venison to grill that my brother-in-law gave us, but I didn’t think it would be enough for dinner. So I decided to pick up some lamb chops. I used a marinade I’ve used on cuts of beef before which works just as well on lamb chops (and venison, too!). The marinade in this recipe is for just a few chops, so if you have more to grill feel free to double the marinade amount.

The grilled lamb chops turned out delicious! Similar to a fine cut of steak, but different enough in flavor to be a nice change of pace. They’re definitely going into my summer grilling rotation. The venison was very good too, but I’ve had grilled venison before, and I knew what to expect. The lamb chops were unexpectedly tasty. I’ve eaten lamb plenty of times in different dishes and cooked various ways, but I don’t know if I’ve grilled lamb chops anytime recently, and these were nice, thick-cut chops, looking like miniature T-bone streaks.

For sides I picked up some asparagus– grilling asparagus directly on the grill is really simple and one of my favorite ways to cook it. I also made a batch of mac and cheese, Clarkston Union style.

Ingredients, lamb chops + marinade:

  • 4 lamb chops
  • 1/4 cup soy sauce
  • 1/2 cup red wine
  • 1/4 cup olive oil
  • 1/2 teaspoon dried rosemary (or 1 teaspoon fresh)
  • 4 cloves of garlic finely minced or crushed in a garlic press
  • 1 teaspoon black pepper


Ingredients, asparagus:

  • 1 lb. asparagus
  • 1 tablespoon olive oil
  • salt
  • pepper


1.
Mix the marinade ingredients and marinade the chops for anywhere from 4 hours to overnight.

Marinating Lamb

2.
Fire up enough charcoal to cover 1/2 the grill (or turn the burners on high on one side of the gas grill, if you must use one). Same grilling method as in my Perfectly Grilled Filet Mignon post: First brown the outside of the chops on both sides by quickly grilling over direct heat, then move to the cooler indirect side of the grill to finish cooking. I also briefly soaked a few apple and hickory chips and threw them on the coals for a smoky flavor.

grillingLamb

3.
Coat the asparagus in the olive oil and season with salt and pepper. When you move the chops to the cooler part of the grill, throw the asparagus on the hot side of the grill (perpendicular to the grate, of course!) and make sure you turn the asparagi by rolling them so they grill up quickly on all sides and don’t burn. When the asparagus is done, the chops should be done (I like my lamb chops to be medium-rare, just like my steaks). Enjoy!

grilledAsparagus

Barbequed Beef Brisket with Chipotle Sauce

Barbequed Beef Brisket

Barbequed Beef Brisket

I finally got around to attempting a slow-smoked barbequed beef brisket today! I’ve been meaning to for a while now. Beef brisket is one of the big three stars of barbeque along with barbequed ribs and pulled pork. The ribs and the pork I’ve done and I was very happy with the results. But I’ve heard barbequed brisket can be a little tricky– it’s easy to end up with a brisket that’s a little tough and on the dry side. And my first attempt could have been a little more tender and juicy, but for the most part I thought it was a good first effort, with room for improvement.

So what did I learn, and what would I do to make it even better for next time? Well, I started with about about a 6 or 7 lb. “point cut” which is one of two cuts from the brisket– the “flat cut” is leaner, so it doesn’t get the same flavor from the delicious melting fat as the beef is cooked low and slow. So, I had the right cut– so far so good. But I made the decision to cut the brisket in half and freeze the other half, because it seemed like a lot of meat and I thought it would cook to temperature more quickly. I probably should have cooked the whole point cut at once.

One note on the type of brisket to buy for barbequeing– don’t confuse this with a corned-beef brisket, which has been cured and flavored with a mix of preservatives and spices, and has that bright-pink color you see in corned beef and cabbage, or deli-style corned beef sandwiches. You want an uncured beef brisket, preferably the point cut.

Normally I would slow-cook something like this in my smoker– the cylindrical thing I used on the barbequed turkey post, but I had just bought a Weber kettle-style grill, the “Gold” model, with a thermometer and an upper grate with a couple cool little hinged wing things on both sides that fold up to add more coals and wood on each side when cooking indirectly. So I was excited to try something a little more complicated than hamburgers or steaks on it. The temperature was easy to keep steady on this grill, but the one drawback was I couldn’t seem to get the temp under 250 degrees without shutting the vents almost completely and risk snuffing out the coals. I think a temp of 225 would’ve been a little more ideal. But I may have started with too many coals on each side. Still, I think next time I’ll go back to the smoker.

So cooking the whole point cut and trying to hold the temp to around 225 will mean it’ll take even longer than my half-cut at 250 degrees, and that took between 9 and 10 hours to reach 190 degrees– the temp at which the tough collagen in the meat melts and makes the meat tender.  Typically when slow-cooking large cuts of meat, there’s a period called the “stall”, I think I’ve mentioned before- the “stall” is where the internal temp of the meat, measured with a meat thermometer, seems to hang around 150 for  hours before it starts climbing again. To combat the “stall” and speed things up, you can wrap the brisket in foil when the internal temp hits around 150. Then remove the foil again for the last hour, or when the internal temp of the brisket hits around 180 degrees, to make sure the “bark”– the dark smoky outer crust of the brisket– has a chance to get nice and crispy. That’s one drawback of the foil-wrap method to fight the stall- it can prevent that delicious “bark” from forming, which  is considered by some the best part of the brisket. The bark on my brisket turned out great, since I didn’t need the foil-wrap trick this time.

Brisket on Grill

Where it all began at 7 am.

Now about the second part of the post title, the Chipotle barbeque sauce…I’ve had a lot of peppers on the jalapeno plants in my garden this year, so I got the idea to try to make my own chipotles– red ripe jalepeno peppers that are smoked for several hours, then turned into a paste or powder. Thing is, it’s hard to make chipotle without growing your own peppers, because it’s difficult to find ripe jalapenos at the store– you usually find only green jalapenos. I left a lot of peppers to ripen on my plants, picked a bunch of them this morning, and smoked them along with the brisket. So when I made my barbeque sauce for the brisket I basically made my version of the North Carolina-style sauce I used when I made pulled pork, but instead of Tabasco I used 4 or 5 of the smoked red peppers. The sauce was really special with the chipotle peppers added! Kristina really liked it too. It could have merited a post of its own. If you want to try making this sauce but unfortunately don’t have any ripe jalapenos on hand or time to smoke them for ten hours, you can use store-bought chipotle powder and it’ll be almost as good.

Ingredients:

  • 1 3-5 lb. Beef brisket
  • Chunks of your favorite hardwood for smoking


(rub):

  • 2 teaspoons black pepper
  • 1 teaspoon onion powder
  • 1/2 teaspoon oregano
  • 1/2 teaspoon thyme
  • 2 tablespoons brown sugar
  • 1-2 tablespoons garlic powder
  • 1 tsp cayenne pepper
  • 1 tablespoon salt
  • 2 tablespoons paprika


(Sauce):

  • 2 cups apple cider vinegar
  • 1/2 cup tomato sauce
  • 3-4 tablespoons brown sugar
  • 1-2 tablespoons salt
  • 2 teaspoons garlic powder
  • 2 tablespoons rub from above recipe
  • 2 tablespoons spicy brown mustard
  • 1-2 tablespoons Worchestershire Sauce
  • 1/2 teaspoon oregano
  • 1/2 teaspoon thyme
  • 4-5 red ripe jalepeno peppers smoked with brisket, or 1-2 teaspoons chipotle powder


Special Utensils:

  • Smoker or Kettle-style grill
  • Meat Thermometer


Start with the brisket. It will have a layer of fat on one side; it should be about 1/4 inch thick. If it’s much thicker, trim some fat until there’s about 1/4″ left, give or take.

Mix up the rub ingredients and rub it on the brisket the night before. Wrap the rubbed brisket up in plastic wrap, put it in the refrigerator, and set your alarm. You’re going to want to get to get started early, because the barbequing’s going to take as long as 13 hours.

Bright and early the next morning, get the charcoal started and soak some of your favorite hardwood in water for smoking– I used apple and hickory. If you’re cooking on a kettle-style grill like I did, you’ll want to have some type of pan in the middle under the brisket to catch the juices, with coals on both sides to cook indirectly. I made a “pan” for the center of the grill out of a couple layers of heavy-duty foil, added the hot coals to both sides and a few chunks of wood on the coals. Place the brisket fat-side up in the center (that way the fat melts down through the brisket, self-basting it) along with whatever else you may be slow-smoking, like red jalapenos, in the center. Cover and adjust vents until you get a nice steady 225-250 temp. You’ll need to add new coals every 2 hours or so, and more wood as needed.

After a few hours, insert your trusty meat thermometer. When you see the temp reach around 150, that’s when you figure out whether you have time to wait it out to the magic 190 degree mark and ensure a nice chewy bark, or you want to speed things along and wrap it in foil.

Now it’s time to make the sauce. Mix the ingredients and heat in a pan for 15 or 20 minutes to not quite the boiling point– a low simmer is good. If you smoked peppers and want to add them to the sauce like I did, let the sauce cool, then add 4 or 5 peppers (stems removed) to a blender with a little of the sauce and puree. Stop, add a little more of the sauce and puree some more. Repeat until all the sauce is blended in.

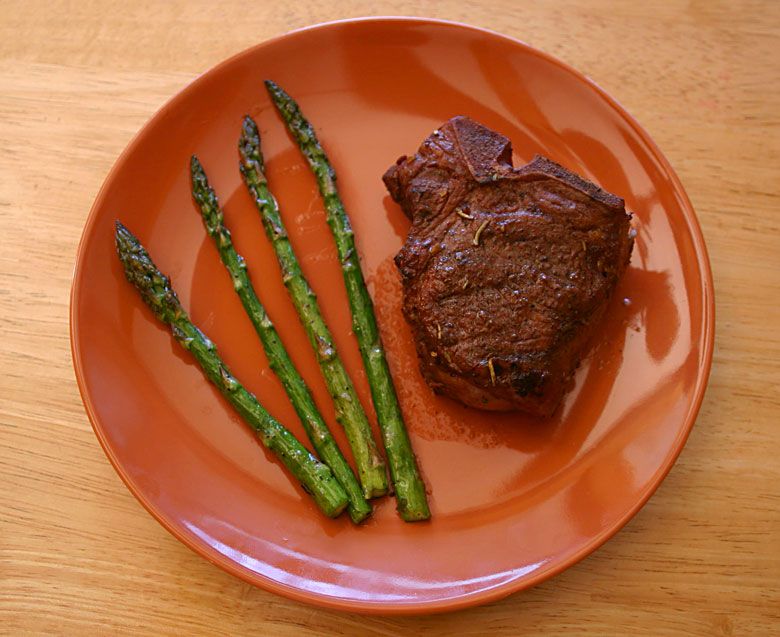
If you did the foil-wrap method, remove the foil when the internal temp hits 180 or so there’s around an hour to finish the outside “bark”. At 190 degrees, remove the brisket from the grill and let it rest for 10-15 minutes before serving. Serve with your favorite sides– I steamed up some broccoli and made another batch of that excellent mac and cheese from this post. Enjoy!


Grilled Chipotle Flank Steak

Grilled Flank Steak

Here’s the follow-up from the Grilled Stuffed Poblano Pepper post, in which, as you no doubt remember, I was going to make fajitas, but the success of the stuffed poblanos happily changed our dinner plans to this marinated flank steak and the stuffed poblanos. But I will one day get around to making fajitas!

Flank steak is a flavorful cut of steak that’s a little tougher than some cuts, but cooked just right (medium-rare to medium) and cut in thin strips across the grain, is really good. Flank steak is often used in Mexican meals like fajitas, burritos, or just with a side of something like the aforementioned Grilled Stuffed Poblano Peppers.

Ingredients:

  • Flank Steak, 1 lb. or so.
  • 1/4 Cup Olive Oil
  • 1/4 Cup Dos Equis, or any beer, or plain water
  • Juice from 2 Large Limes
  • 1/2- 1 Tsp. Chipotle Powder
  • 1/2 Tsp. Black Pepper
  • 1/2 Tsp. Salt
  • 1/2 Tsp. Oregano
  • 1/2 Tsp. Ground Cumin
  • 4-5 Cloves Diced Garlic


Special Utensils:

  • Just a Grill

Serves 4

Mix all the marinade ingredients and combine in a one-gallon ziplock bag with the flank steak. Let marinade for 4 hours to overnight.

As always, heat up enough charcoal to cover 1/2 of your grill and soak some pieces of your favorite smoking wood, as mentioned in previous posts like Perfectly Grilled Filet Mignon. Also, since the steak is marinated, put some foil on the cooler non-coal side to catch the marinade drippings.

When the coals are ready, spread them out on 1/2 the grill and throw on the drained wood chips. Start the steak on the cooler non-coal side. Since flank steak is thin, it won’t take long to get to medium rare/medium– 4-5 minutes on a side on the indirect heat side, and 2 minutes or so on the hot coal side to finish the steak off with a little sear. I don’t bother with a meat thermometer when the steak is this thin, I just go by touch. A good guide to go by is feeling the pad on the palm of your hand under your thumb– if you touch your thumb to your index finger, that’s what rare feels like. Thumb to middle finger is medium-rare. Ring finger- medium/medium well, and thumb to pinky is well-done.

If you decided to make fajitas, grill some vegetables along with the steak– cut a red and green pepper and an onion in half, coat with a little olive oil, sprinkle on a little salt & pepper and throw them on the grill too. Once the peppers and onions are done, cut them into thin strips that can fit in tortillas easily, along with some avocados and maybe diced fresh tomatoes. serve with your favorite salsa and shredded cheese, and maybe even some sour cream if you want to get crazy. As for tortillas– flour is most common but I like corn tortillas. Either will make good wraps for your fajitas. Enjoy!

Grilled Stuffed Poblano Peppers

Stuffed Poblano Peppers

I felt like grilling something sort of Mexican style last weekend. I had a general idea of marinating and grilling flank steak with some peppers and onions and making fajitas. So I stopped at the grocery store to get a few ingredients– the steak, some corn tortillas… and I noticed some nice-looking poblano peppers that intrigued me. Decided to pick up a few poblanos, not sure what I’d do with them. We already had plenty of red and green peppers to grill for the fajitas, so I decided to stuff the poblanos. Never tried stuffing them before, but I’d heard about stuffed poblano peppers and it sounded good in theory. Well, I put together some stuffing ingredients from what I had around, and the stuffed poblanos turned out fantastic on the grill! Delicious and filling. So good in fact, that we started eating them first and almost forgot about the flank steak, although that turned out great too. Maybe I’ll do a post about the flank steak next week. We decided the stuffed poblanos and the steak would be enough for dinner and figured we’d make fajitas another day.

It’s easy to make this a vegetarian meal if you use water instead of chicken stock to cook the rice and leave out the bacon. Leave out the cheese, and it’s vegan.

Ingredients:

  • 4 Poblano Peppers
  • 1 cup long-grain rice, like Basmati
  • 2 Cups Low-Sodium Chicken Stock or Water
  • 6 Strips Cooked, Diced Bacon
  • 1 Small Diced Red Onion
  • 1 Can Black Beans
  • 1/2 Cup of your Favorite Salsa
  • 1/2 Cup of Shredded Cheese– Cheddar, Colby, Monterey Jack, or any combo thereof
  • 1 Tsp. Granulated Garlic Powder
  • 1/2 Tsp. Chipotle Chili Powder
  • 1/2 Tsp. Oregano
  • 1/2 Tsp. Black Pepper


Special Utensils:

  • Just a Grill


Serves 4

Heat the 2 cups of low-sodium chicken stock or water to boiling, then add the rice, turn heat down to low, and cover. When the rice is ready in about 20 minutes, mix with the other stuffing ingredients. The same tip I gave for the fried rice recipe applies here– use just a little bit less than 2 cups of liquid to the 1 cup of rice, and it’s also a good idea to undercook the rice just a little. There’s more liquid to be added with the salsa and beans and more cooking to be done on the grill.

Cut the tops off the poblano peppers and carefully cut the two ribs on each side of the seed pod area that holds it to the inside of the pepper, so the seeds can be removed. Fill the empty pepper with the stuffing mix and put the top of the pepper back on, holding it on with two toothpicks.

The same grilling instructions from the Perfectly Grilled Filet Mignon post apply here: Get enough charcoal ready for one side of the grill, and soak a handful of your favorite type of wood chips. When the coals are ready, add the wood chips and roast the peppers on the hot side of the grill to get a nice char (but be careful not to burn them), turning at least once to a side. Then move the peppers to the cooler side of the grill to finish cooking. The peppers will take about 15 minutes total to cook, so if you’re grilling them with a thin steak like a flank steak, you’ll want to start the peppers first. Enjoy!

Garlic and Soy Sauce Marinated Grilled Chicken

Garlic and Soy Sauce Marinated Grilled Chicken

Garlic and Soy Sauce Marinated Grilled Chicken

Wanted to grill something this past weekend. But we didn’t have much in the house and this is the season when all the yard work makes every weekend minute precious– no time in the schedule for a last-minute grocery store run. Let’s see what we have…hmmm, some boneless chicken breasts. OK, but how to season them…a spice rub? Nahh, done that many times. Maybe some kind of marinade, but what kind exactly? What to make, what to make… finally decided on a quasi-Asian style marinade. Only had a few hours to marinate it, but it turned out great! For a side dish I made some fried rice with ingredients I had on hand– that’s what’s in the background of the pic above. The rice turned out really good too– I’ll make a separate post on the fried rice next week.

Ingredients:

  • 4 Chicken Breasts, Boneless or better yet, Bone-in. Dark meat such as chicken thighs work really well for this recipe too.
  • 1/2 Cup Water
  • 1/2 Cup Peanut Oil
  • 1/4 Cup Mirin (Rice Vinegar)
  • 2-3 Tablespoons Soy Sauce
  • 1 Teaspoon Fine-Ground Black Pepper
  • 1/2 Teaspoon Toasted Sesame Oil
  • 1 Whole Head of Garlic


Special Utensils:

  • Meat Thermometer
  • Garlic Press (optional)


Serves 4

Separate the cloves from the head of garlic and remove the skins. Dice up the garlic, or better yet, crush the cloves in a garlic press. Mix the garlic with the rest of the marinade ingredients. Marinate the chicken for at least several hours, preferably overnight.

As always, heat up enough charcoal to cover half the grill, and either burn some of your favorite hardwood down to coals or soak some wood chips for smoking. What I’ve been doing lately is lighting the charcoal in a chimney starter, then pouring out the coals onto the bottom of the grill when they’re good and ignited (but before they’re covered in gray ash, meaning they’re ready for cooking). I put some pieces of wood on the charcoal so it has a chance to catch fire, burn down to coals and be ready for cooking when the charcoal’s ready. the slightly quicker, easier method is to briefly soak wood chips, and throw the chips on the charcoal when it’s ready for cooking. I used apple wood, and it worked really well with this recipe.

Here’s a tip for cooking marinated meats when the coals and the smoking wood are ready– I tried this with the chicken, and it worked nicely. Usually you want to cook the meat on the hot side of the grill first to get a nice sear on the outside, then move to the cooler side of the grill to finish cooking. This works great if you used a dry rub, or you’re cooking some nice steaks seasoned only with a little salt and pepper. But if you take marinated meat directly from the marinade to the hot side of the grill it will drip on the coals and create a sooty smoke that may give the meat an off-taste. Also, it’ll be hard to get a good sear on the wet marinated meat right away. Works better to cook on the cooler side of the grill first– put down a drip pan or some foil to catch the excess marinade. Use the meat thermometer and when the chicken is close to temperature, move to the hot side of the grill to brown both sides of the chicken last. Cook to 165 degrees, let the chicken rest for a few minutes, serve and enjoy!