Category Archives: Spicy

Chicken Curry

Chicken Curry 1
Here’s the recipe I promised I’d post to go with the curry powder recipe I posted last time. Once again, here it is holiday time, and unlike most other food blogs this time of year, I’m posting a recipe that doesn’t really have anything to do with the holidays. Or does it? It’s colorful, with lots of red and green– festive holiday colors! And this can be a healthier change of pace between the heavier, high fat holiday meals. Or for afterward, when New Year’s Resolutions kick in. Plus, a good, tasty curry every now and then will help get you through the long winter months to come.

This is a very healthy meal with its variety of vegetables, and even the curry powder may have health benefits. As for what oil to use, ghee is typically used in Indian cooking– it’s butter that’s been clarified by heating it and removing the milk solids. It’s supposed to be a little lower in saturated fat, therefore healthier than butter. But I just used regular butter, which I don’t think is really all that unhealthy used in reasonable amounts. Or you can use olive oil.

This can also be a pretty quick and easy meal to make. It’s not necessary to make your own curry powder, you can use store-bought curry powder and this curry will still be very good. And you don’t need to go through the process of browning the onions– it adds some depth and complexity to the flavor, but you can just cook the onions with the red and green pepper to save time. If you choose not to brown the onions use about half the onion this recipe calls for, because browning the onions really reduces their volume.

Ingredients:

  • 1 lb. boneless skinless chicken breasts
  • 1/2 red bell pepper
  • 1/2 green bell pepper
  • 3-4 medium to large onions
  • 5-6 garlic cloves
  • 1 tablespoon fresh ginger
  • 1 15 oz. can diced tomatoes
  • 3-4 tablespoons low-fat unflavored yogurt
  • Juice of one lime
  • 2-3 tablespoons curry powder
  • 1 tablespoon garam masala (optional)
  • 1-2 bay leaves
  • Added red pepper to taste
  • Chopped cilantro (optional)
  • 2 cups chicken stock
  • 4 tablespoons butter, ghee or olive oil
  • 3 cups cooked basmati rice

Serves about 4

1.
Get the rice cooking according to its package directions so it’s ready by the time the curry is. Now get the primary ingredients cut up: dice up the onions, mince up the garlic and ginger, chop the red and green pepper into chunks and cut the chicken into around 1″ cubes:

Chicken Curry Ingredients
2.
Now we’ll brown up the onions. If you want to make a quicker version of this, you can skip this and go on to step 3, and cook the onions with the other vegetables. Heat up two of the tablespoons of butter, ghee or oil in a large pan and cook the diced onions on medium-high heat, constantly stirring, until the moisture starts to cook out of them and they turn brown. This will take about 20 minutes to a half hour. Careful to just brown the onions, not burn them. Here’s what they look like when they’re almost ready:

Browning Onions for Curry
3.
Brown the chicken on medium-high heat with a tablespoon of butter/ghee/oil. I used a separate pan so I could brown the onions at the same time in the other pan, but if you don’t brown the onions you can do all the cooking in one pan. No need to make sure the chicken is cooked completely through– it’ll finish cooking in the curry sauce.

Browning Chicken for Curry
4.
Once the chicken is browned, remove it and cook the peppers (and onions if you’re not browning them) until softened up, adding another tablespoon of butter/ghee/oil if needed. Add the minced garlic and ginger once the peppers have gotten a good head start.

Cooking Curry Vegetables
5.
Deglaze the pan– add a little chicken stock to the pan that the vegetables and chicken cooked in, and use a spoon to scrape up the browned stuff in the pan from the chicken. Do the same to the pan with the onions if you browned them. Combine the cooked vegetables in one pot with the rest of the chicken stock, chicken, can of diced tomatoes, spices and bay leaves. Simmer in an open pot for at least a half hour. Note: I added some garam masala as well because I had it on hand, but if you don’t have it you can just use a little more curry powder instead.

Simmering Chicken Curry
6.
When it’s done simmering, add the lime juice and mix in the yogurt. Add some red pepper if it’s not spicy enough for you. Serve over the rice. Add some fresh chopped cilantro as a garnish if you like. Enjoy!

Chicken Curry 2

Curry Powder

Curry Powder

I’m back, after taking several months off. And what do I come back with after all that time– recipes for creative things to do with your Thanksgiving leftovers, like most food blogs will do this time of year? No, I have to be different. Why a curry powder recipe post on Thanksgiving weekend? It is actually related to Thanksgiving leftovers: We go to Kristina’s parents for Thanksgiving, so my only experience with cooking turkeys so far is smoking a whole turkey. But we get plenty of turkey leftovers to take home, so I used the bones to make a big batch of turkey stock, and then I used some of the stock and turkey meat to make this Curried Turkey Soup Recipe from Simply Recipes, which was really good.

Why go to all the trouble of making your own curry powder, when you can just buy it ready-made anywhere? And why do I keep asking and answering my own questions in this post? Well, there’s a couple reasons why it’s nice to make your own curry powder from scratch. And it’s really not all that much trouble. First, you start with spices in their whole, unground form, and unground spices will stay fresh a lot longer than when they’re purchased pre-ground. So your curry powder, made in small fresh-ground batches, will be at the peak of flavor. Also, you can adjust things to suit your taste. The mad scientist in me likes experimenting with amounts and types of ingredients to fine-tune what I like best.

Although I’m using my curry powder to try a recipe from the great Simply Recipes site this time, I’ll use this curry powder in my own chicken or lamb curry recipe in an upcoming post.

Ingredients:

  • 2 1/2 tablespoons coriander seeds
  • 1 tablespoon cumin seeds
  • 1 tablespoon mustard seeds
  • 1 tablespoon black peppercorns
  • 1 teaspoon fenugreek seeds
  • 1/2 teaspoon cardamom seeds
  • 1 tablespoon powdered turmeric
  • 1 teaspoon powdered ginger
  • 1/2 teaspoon powdered red chili pepper or two dried peppers
  • 1/2 teaspoon powdered cinnamon or two cinnamon sticks
  • 1/4 teaspoon powdered cloves or 3-4 whole cloves

1.
Go spice shopping! Hopefully you have an Indian grocery near you. If not, it may be difficult to find all the proper ingredients, so you may have to shop online for them. I recently stopped by an Indian grocery near where I work and stocked up on spices. Indian groceries are a great source to get spices very inexpensively. And not just spices typically used in Indian-style cooking– things like whole bay leaves are much cheaper than they typically are at other stores. Mustard seeds, chili pepper, and many other spices you can use in many different styles of cooking can be found here. I bought all of these spices for under $25.00:

Spices Purchased
2.
Measure out the spices. Now, the plan is to start with as many spices in their whole form as possible, so they can be ground up fresh. But you may not have everything in whole form on hand. In the picture below the only ingredients I started with in powder form are turmeric and ginger, because these related vegetables come in root form, not seeds, like many of the other ingredients. So it’s easier to buy these in pre-dried and pre-powdered form. Also, I didn’t have whole cloves, and whole dried cloves don’t grind up easily, so I used powdered cloves. You may not have whole dried red chilies or whole cinnamon sticks, so it’s perfectly fine to use chili powder or ground cinnamon instead. The spices that are best to start out with whole are the dried seeds– cumin. coriander, fenugreek, cardamom, mustard, and black pepper– because we’re going to further bring out the flavor of these by toasting them before we grind them up.

In the picture below, on the plate, in clockwise order starting with the peppers– whole dried red chili peppers, black peppercorns, cardamom seeds, fenugreek, mustard seeds, cinnamon sticks, coriander seeds and in the center, cumin seeds. In the small bowl, clockwise from the top are ground turmeric, cloves and ginger:

Curry Spices-Whole

3.
Now we’ll toast all of the dried seed spices– everything on the plate in the step 2 pic, except for the chilis and cinnamon sticks. just add the spices to a pan wide enough that they’re spread out in a single layer, on medium-high heat, and shake them around in the pan until they just start to lightly brown- careful not to burn them:

Toasting Curry Spices

4.
Now grind up all the whole ingredients, either in a dedicated spice grinder, food processor, or whatever you can use to get everything in powdered form. I use an old coffee bean grinder that I now use exclusively for spices. When the whole spices are mostly ground up I throw the pre-ground spices in for a few more spins of the grinder just to help mix everything up:

Grinding Curry Spices

This recipe makes about a 1/2 cup of curry powder, which (depending on how curried you like your curries) will probably be good for two meals. The unused curry powder will stay fresh in a sealed container for a few weeks. enjoy!

Shrimp Jambalaya

Shrimp Jambalaya(Jambalaya aux Chevrettes)

A few weeks ago I posted a recipe, Gumbo Filé, from the ‘Picayune Creole Cook Book‘ and said I’d try more recipes from this historical New Orleans cookbook. Here’s another, just in time for Mardi Gras (or for Lent, because as the recipe says, if on Friday and you do not eat meat, you can substitute ‘oyster water’ in place of broth. Or in our case, bottled clam juice in place of broth, because you probably won’t be able to get a hold of enough oyster water. I discussed not being quite sure what ‘oyster water’ even is in the Gumbo Filé post).

So here’s what I did differently this time in this recipe from the Picayune recipe:

First, 80 lake shrimp in the Picayune recipe? 80?? I’m not even exactly sure what New Orleans lake shrimp are. Maybe they’re very small shrimp. The cookbook mentions river and lake shrimp, and says that river shrimp are smaller and more delicate than the lake shrimp. But how much larger New Orleans lake shrimp actually may be, I have no idea. anyway, 80? I used 20 jumbo shrimp for my recipe, which was fine for serving 4.

The Picayune recipe calls for cooking the shrimp for waaaayyy longer than I ever heard of doing– first it says to boil the shrimp according to another recipe in the book, then to cook the shrimp for another 45 minutes along with the rice in the jambalaya. I think this must be a difference in basic philosophy in how to cook shrimp between the day the Picayune book was written and these days. I have no idea what you’d even be left with, shrimp-wise, after boiling the shrimp, then further cooking for 45 minutes. Maybe that’s why the Picayune starts with 80 shrimp– perhaps they shrink down to little rubbery calamari-like bits. I cooked the shrimp the way it’s usually done these days, by adding it just a few minutes before the jambalaya is done.

This recipe, which you can follow on page 163 of the Google Books copy of the 6th edition of the Picayune Creole Cook Book if you want to see the original instructions, calls for cooking the rice with the Jambalaya, but I cooked it separately as in the Gumbo Filé recipe, because rice cooked with the jamablaya will keep absorbing liquid and quickly turn mushy, especially the next day if you have leftovers.

Finally, I went ahead and added a few more ingredients I’m used to with meal like this, like bell pepper and celery to make the veggie trinity along with the onion, and a little oregano.

Ingredients from the Picayune Creole Cook Book:

  • 1 1/2 Cups of Rice
  • 3 Tomatoes
  • 80 Lake Shrimp
  • 2 Onions
  • Cayenne to Taste
  • 1 Tablespoonful Butter
  • 1 Tablespoonful Flour
  • 1/2 Teaspoonful of Chili Pepper
  • Salt
  • Pepper
  • 2 Cloves of Garlic
  • 2 Sprigs each of Thyme and Bay Leaf

(I think the last ingredient listing meant 2 sprigs each of thyme and parsley, plus bay leaf, because the recipe directions mention adding chopped thyme, parsley and bay leaf)

Ingredients I used:

  • 1 1/2 Cups of Rice
  • 1 15 oz. can diced tomatoes
  • 20 Jumbo Shrimp
  • 1 Large Onion
  • 1 Bell Pepper
  • 2 Stalks Celery
  • Cayenne to Taste
  • 1 Tablespoon Butter
  • 1 Tablespoon Flour
  • 1 Quart Chicken Stock (or bottled clam juice)
  • 1/2 Teaspoon Chili Pepper
  • Salt
  • Pepper
  • 4 Cloves of Garlic
  • 2 Sprigs Thyme
  • 2 Sprigs Parsley
  • 1 Teaspoon Oregano
  • 1 Bay Leaf


Serves 4

Chop up the onion, bell pepper and celery and cook in a pot with the butter, stirring until the vegetables are well cooked and a little browned. Mix in the flour. Then add the finely chopped garlic, thyme and parsley and fry, stirring, for another 5 minutes or so.

Add tomatoes and either chicken stock or clam juice which has been heated up. I added about a quart of homemade chicken stock, plus a little bit of quick seafood stock I made by taking the shells from the shrimp I used in the recipe plus a couple extra sprigs of thyme and some black peppercorns and boiling in some water in a little pan for a 1/2 hour or so. I did that just to add a little more seafood flavor to the jambalaya. You could also use 1/2 chicken stock or broth and 1/2 clam juice, or as mentioned, all clam juice.

Add the bay leaf and the remaining spices and simmer on low for 1/2 hour to 45 minutes. A few minutes before serving, add the raw shelled shrimp. The shrimp should cook only long enough so it just starts to turn from translucent to opaque.

Serve over cooked rice. Garnish with fresh chopped parsley if you like. Enjoy!

Gumbo Filé

Gumbo File

I thought I’d try something a little different here– I found a book called the “Picayune Creole Cook Book” at a garage sale a while back, and it turned out the book has a pretty interesting background, being part of the history of New Orleans cuisine. It was originally printed at the very beginning of the 20th century and 17 editions were printed between 1901 and 1985. I’m the proud owner of a copy of the 13th edition that’s in very nice condition, printed in 1966. Here’s an online article about the history of the book for those of you who may be interested, from a writer at the New Orleans Times-Picayune appropriately enough. Here’s a Google Books copy of the 6th edition of the Picayune Creole Cook Book online.

I’ve been interested in Creole and Cajun-style cooking for a long time, and I’ve posted a couple Creole/Cajun style recipes, like the recipe for “Jambalaya Gumbo” I posted a while back. But I didn’t how close my attempts at making it were to the “real thing”. There’s nothing set in stone about this style of cooking– it’s based in French cuisine and influenced by Spanish and African cuisines and ingredients, as well as local ingredients that were readily available. So this style of cooking, with its rich variety of cultural and regional influences, suits my tendencies to tinker and experiment with recipes perfectly. But sometimes it’s good to get a baseline– to modify a style of anything to make your own version and make it well, it’s important to have a good understanding of what you’re modifying. So I thought I’d try my take on some recipes from the Picayune cookbook.

One surprise about these recipes is that the ingredients are a little different than I had expected. I had heard about the “holy trinity” of herbs used in most Cajun/Creole style recipes: oregano, thyme and bay leaves. Here parsley is used in place of oregano. Then the “holy trinity” of vegetables I had heard about, onion, bell pepper and celery, was also a little different: no celery and very little pepper. And no garlic? Other than substitutions I made out of necessity (which I’ll point out in the recipe instructions) I tried sticking close to the basic recipe, not get too “mad scientist” and make too many embellishments, as I’m often tempted to do. One of the exceptions I made was, the recipe just seemed like it needed a few cloves of garlic– I couldn’t resist adding some.

One ingredient, which obviously is important since it’s part of the name of the dish, “Filé”, you may not be familiar with. It’s the ground-up leaves of the sassafras plant, which thickens the gumbo and adds a subtle but distinctive flavor to the dish. From the Picayune book:


First, it will be necessary to explain here, for the benefit of many, that “Filé” is a powder, first manufactured by tribes of Choctaw Indians in Louisiana, from the young and tender leaves of the sassafras. The Indian squaws gathered the leaves and spread them on a stone mortar to dry. When thoroughly dried, they pounded them into a fine powder, passed them through a hair sieve, and then brought the filé to New Orleans to sell, coming twice a week to the famous French market, from the reservation set aside for their home on Bayou Lancombe, near Mandeville, La. The Indians used sassafras leaves and the sassafras for many medicinal purposes, and the Creoles, quick to discover and apply, found the possibilities of the powdered sassafras, or “Filé“, and originated the well-known dish, “Gumbo Filé“.


–little bits of history like that among the recipe instructions are part of what make this book such a great and interesting find.

Here are the ingredients, first from the original recipe from the book, and the ingredients I used in my version. If you’d like to see all of the original recipe it’s on the first page of the “Creole Gumbo” chapter in that Google books link to the Picayune cook book I linked to above.

Ingredients from the Picayune Creole Cook Book:

  • 1 Large Tender Chicken
  • 2 Large Slices or 1/2 lb. Lean Ham
  • 2 Tablespoons of Butter or 1 of Lard
  • 1 Bay Leaf
  • 3 Sprigs of Parsley
  • 3 Dozen Oysters
  • 1 Large Onion
  • 1 Sprig of Thyme
  • 2 Quarts of Oyster Water
  • 2 Quarts of Boiling Water
  • 1/2 Pod of Red Pepper, without the Seeds
  • Salt and Pepper and Cayenne to taste
  • 3 Tablespoons of Filé

(Oddly, although it’s one of the main ingredients of the recipe, Filé wasn’t added to the ingredient list in the 6th edition, though it’s discussed thoroughly in the instructions. This oversight was fixed in the 13th edition I have.)

Ingredients I used:

  • 1 lb. chicken breast and thigh meat
  • 1/2 lb. lean ham
  • 2 dozen oysters, shucked, with the liquor from the oysters reserved
  • 1 qt. clam juice, with the oyster liquor and water added to make 1 1/2 quarts
  • 2 tablespoons butter
  • 1 medium to large onion
  • 2-3 cloves garlic
  • 2 sprigs thyme
  • 3 sprigs parsley
  • 1 bay leaf
  • 1 red bell pepper
  • 1 chili pepper
  • Salt, black pepper and cayenne pepper to taste
  • 2 tablespoons filé powder


I reduced my version of the recipe to about 2/3 of the original, which was said to serve 6. This recipe will serve 4 just fine.

The Picayune recipe called for “2 quarts oyster water and 2 quarts boiling water” without explaining exactly what “oyster water” is. As far as I could tell, “oyster water” is the water or “liquor” reserved from shucked oysters. How one collects 2 quarts of it though, I’m not sure. I got about 1/2 cup of oyster liquor from the 2 dozen oysters I shucked for this recipe. I guess with all the oysters they shucked in turn-of-the-century New Orleans, oyster water was in plentiful supply. Anyway, doing a little research online, apparently clam juice (commonly available in bottles) is an acceptable substitute. Also, I don’t know why the original recipe called for an entire gallon of liquid (2 quarts of oyster water plus 2 quarts of boiling water). I added the 1/2 cup of oyster liquor and enough water to the quart of clam juice to make 1 1/2 quarts, less than half of the amount in the original even though my recipe was only reduced by a third, and it was plenty of liquid for this recipe.

The original called for “1/2 pod of red pepper, without the seeds”. I assume the recipe meant a pepper like a cayenne or some other type of chili pepper, not a red bell pepper. But I wasn’t sure, so I went ahead and added both. I like peppers, and as mentioned I couldn’t resist tinkering with things a little. That plus adding garlic were the only voluntary substitutions I made, so I think I stayed pretty true to the original recipe.

Now, for the cooking directions part of the recipe, first I’ll start with the shucking of the oysters. Since I’ve never actually shucked an oyster before, this is the first thing I attempted. The Picayune recipe never even mentions shucking the oysters– for the intended audience for this recipe, your average early 20th century New Orleans cook, it was probably as simple and obvious to mention as how to crack an egg. But not so easy for me at first– I thought it was going to take me forever to shuck 2 dozen, and maybe seriously wound myself in the process. But once you get the hang of it it’s not too bad.

I used a flat-head screwdriver to do the shucking. If you plan on doing any amount of oyster shucking in your future you might want to get a specially designed oyster knife. DON’T use a sharp kitchen knife.

Oyster ShuckingPut the oyster on a flat surface and find the shell’s hinge. At the hinge there should be a natural space large enough to get the screwdriver or oyster knife point in, and this is where it gets tricky. At first it seemed impossible to pry open– if I twisted or pried too hard, part of the shell would break off. So I tried using force to get the screwdriver in between the shell, and only succeeded in slipping and jamming it into my wrist. That hurt! Fortunately, no major harm done to me. Unfortunately, none done to the oyster yet either. The trick, it turned out, is to wiggle the point into the gap, not pressing too hard. When it’s in far enough, like an 1/8″ or so, try carefully prying and twisting at different angles until you can get enough purchase and the shell gives way. You eventually get a feel for it.

With the shell opened slightly, slide a regular knife in on one side, against the shell, to cut the oyster away from the inside of the shell. Now your oyster is revealed. Carefully pour off the liquid, the “oyster liquor” in a container to save. Cut the oyster away from the other shell and save it in another container and refrigerate oysters and oyster liquor for a little later.

Meat and Veggies
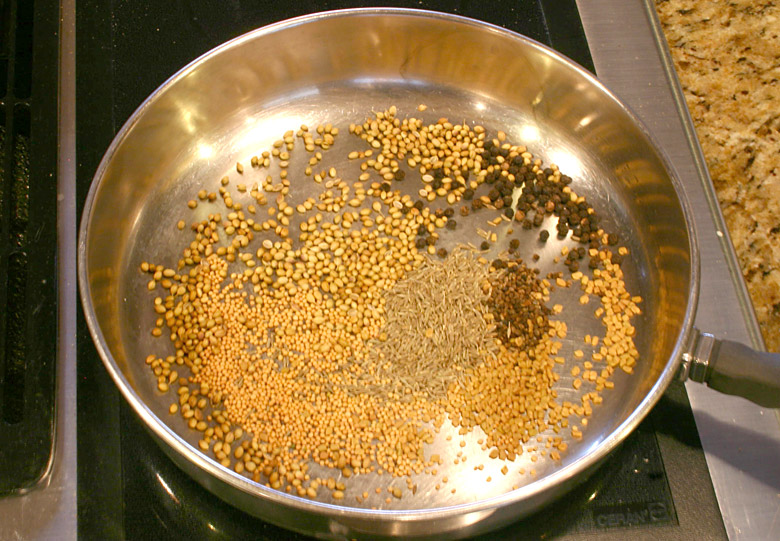
Now cut the chicken and ham into bite-sized pieces. Chop the onion, parsley and thyme (and the added garlic and pepper) “very fine”. Start heating the quart and a half of clam juice, liquor from the oysters and water in its own separate pan. Heat up the butter in a “deep stewing pot” and fry up the chicken and ham. Then add the veggies and cook until the onion is browned, stirring a lot so as not to burn. When everything’s nicely browned, add the heated clam/oyster/water mix and the rest of the seasonings– bay leaf, salt, black pepper and cayenne pepper.

Let that all simmer for an hour or so. A few minutes before it’s about ready, add the oysters.

the filé should be added at the very end, because the gumbo should not be on heat or reheated with the filé added, or it will become “stringy and unfit for use”, according to the Picayune. The Picayune recipe here calls for a complicated procedure using tureens and hot water baths to keep the gumbo warm for serving, but since we intended to immediately eat the gumbo, I just turned off the heat and thoroughly mixed the filé in a little at a time.

Serve with rice that was cooked separately (“never boil the Gumbo with the rice”, the Picayune says), and garnish with some fresh chopped parsley if desired (that’s my recommendation).

What was my takeaway from this experiment in early 20th century New Orleans cooking?

  • The adventure in oyster shucking was a learning experience. I’d still like to know exactly what “oyster water” is– I find it hard to believe the recipe meant 2 quarts of 100% liquor from shucked oysters alone. At my yield of 1/2 cup of oyster liquor from 2 dozen oysters, that would mean shucking 32 dozen!
  • I liked using the fresh parsley instead of oregano, but I think it would be good in addition to oregano perhaps next time. And I will always add garlic to anything remotely Creole/Cajun style. Likewise the liberal addition of both bell and chili peppers.
  • Filé is an interesting ingredient to work with– I’ve used it before but not in a long time. The filé I used for this recipe didn’t thicken the gumbo up as much as I remembered it doing, but it does add a unique subtle flavor.


All in all, It turned out really good. My wife Kristina said “this one’s a winner!” I hope you enjoy it too.


Cajun Pasta

final1

My wife ordered something called “Cajun Pasta” from a restaurant once, and she really liked it, so much she asked me to give it a try sometime. She liked my version, and it’s since worked its way into a semi-regular rotation on the weekend meal list.


Ingredients:

  • 12 Raw peeled-deveined jumbo shrimp
  • 1 Boneless chicken breast
  • 2 Andouille sausages, or Mexican chorizo
  • 1 15 oz. can diced tomatoes or several fresh tomatoes
  • 2 Cups chicken stock
  • 1/4 Cup olive oil
  • 2-3 Tablespoons flour
  • 1 Green pepper
  • 1 Large onion
  • 4-5 Cloves garlic
  • Juice of 1 lime
  • Black pepper to taste
  • Cayenne pepper to taste
  • Cajun/Creole seasoning to taste
  • Salt to taste
  • 1/2 Tsp. thyme
  • 1 Tsp. oregano


Serves 4

Chop up vegetables, cut up chicken and sausage.

Cover the chicken pieces liberally in the Cajun/Creole seasoning of your choice– I used Tony Chachere’s Creole Seasoning. Add a tablespoon of olive oil to a pan, get it good and hot, and brown the chicken and sausage. Then add the vegetables and cook until the veggies start to soften up, then we’ll take the cooked meat and veggies off the heat and set aside.

Most other Cajun Pasta recipes online call for adding heavy cream, and I’m sure those versions are really good, but I like to keep it a little lighter with my version (and I didn’t have any heavy cream anyway). So I made a roux, as with the Gumbo/Jambalaya recipe, but using 1/4 cup or a little less of olive oil. Add the olive oil to a pot large enough to finish cooking all the ingredients. Heat the oil on medium heat and gradually add the flour, stirring it in constantly. Since we’re using olive oil, which doesn’t withstand heat as well as butter or peanut oil, don’t cook the roux until it’s browned, we’ll go with a “blond” roux– just cook and stir until it’s the consistency, but not the color, of peanut butter.

When the roux is ready, add the cooked meat and veggies, the tomatoes, and slowly add and stir in the chicken stock. Add the seasonings, including more of the Cajun/Creole seasoning if you like. Simmer for about 20 minutes- 1/2 hour. Add the lime juice when it’s almost done cooking.

Serve over your favorite pasta (I used penne rigate), and add shredded parmesan cheese, and some chopped parsley if you like. Enjoy!